Welcome to Blender-VRS Documentation
Using the addon includes 6 steps, distributed over 6 panels.
Detailed Suspension Properties
Curve Camber Alignment
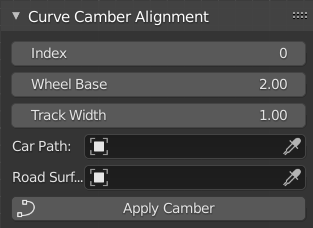
Camber Panel

First, select an index that was not used before in the scene, ignore it for the first time.
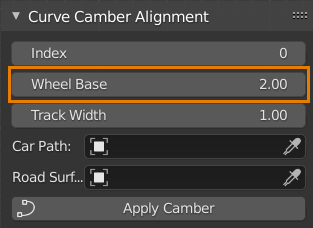
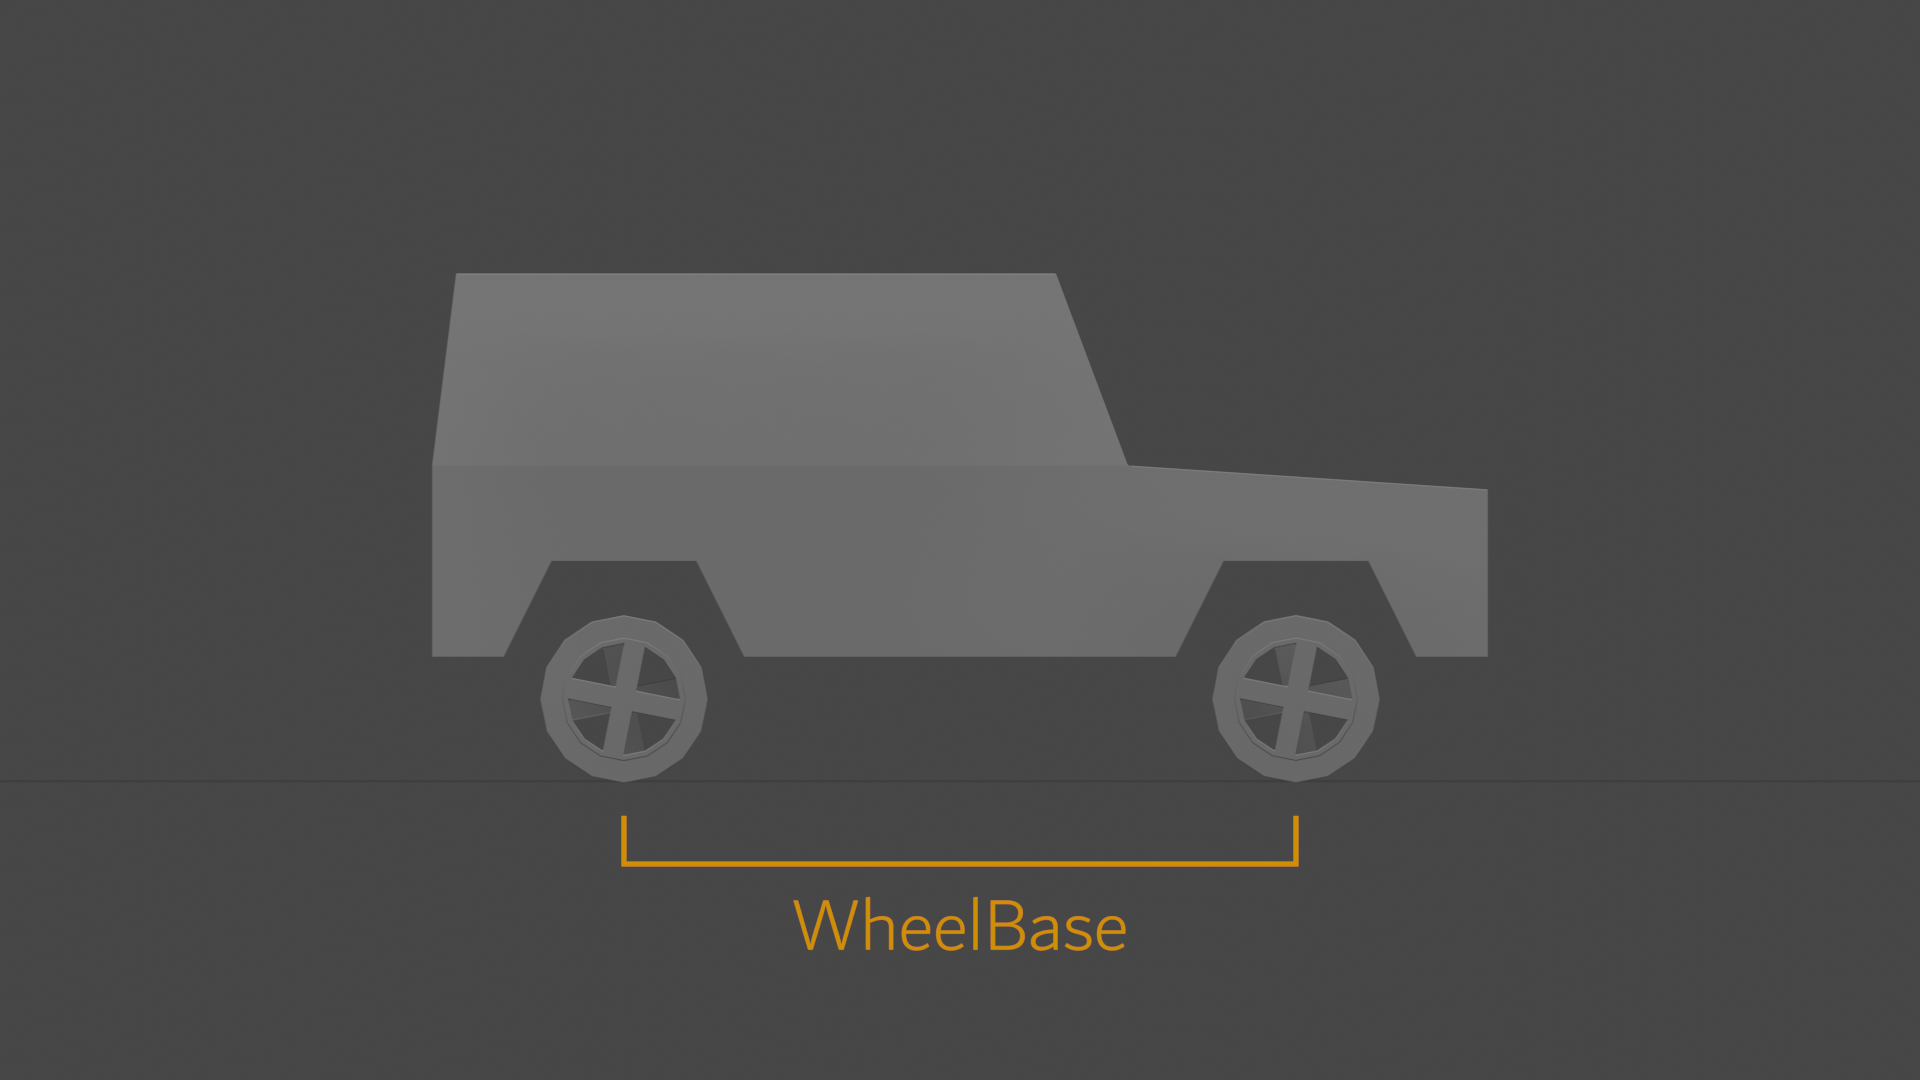
Second, enter wheelbase value by meters, see image above & below.

Third, enter trackwidth value by meters, see image above & below.

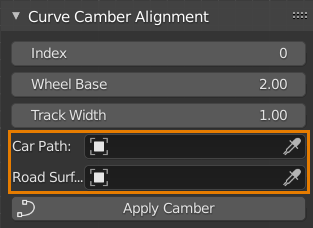
Fourth, select the curve and road surface.

Fifth, make sure the above properties are set properly, then click “Apply Camber”.
Rig Creation

Rig Panel

Make sure the above properties are set properly, then click “Create Reader Rig”.
Curve Driver

Driver Panel

First, enter lateral and longitudinal acceleration values, the larger the faster.


Second, enter slope effect ratio. Note: use values less than one if the road surface is steep, otherwise errors will show up.

Third, choose an initial frame, initial speed, final speed, and top speed.

Fourth, enter drifting slip angle, zero disables drifting. Then, enter the value in which how many skipped frames between keyframes for drift control.

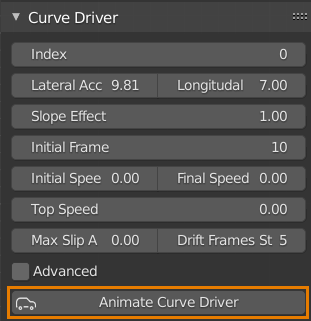
Fifth, make sure the above properties are set properly, then click “Animate Curve Driver”.
Suspension
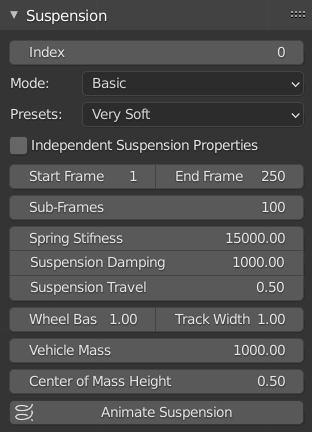
Suspension Panel

First, three UI modes are depending on the level of customization the users want, basic is for me and most people, standard displays a reasonable number of properties, advanced is for nerds.
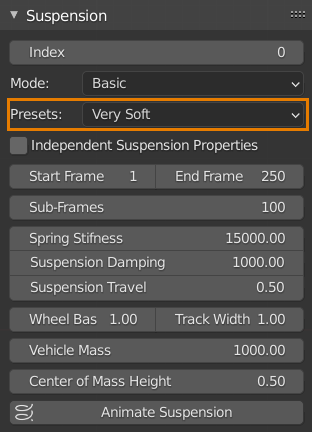
Second, presets are pre-set or preset, it's somewhat obvious, 5 modes are included depending on the final desired look.

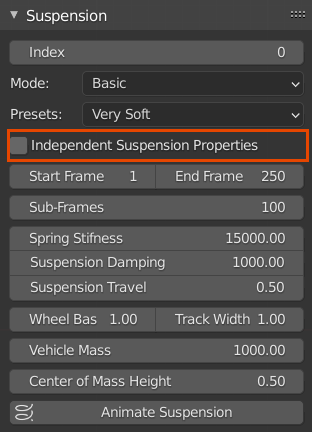
Third, Independent Suspension Properties will allow you to tune each wheel suspension independently of other wheels. Note: this option is experimental, not insured to produce professional results.

Fourth, set the start frame and end frame, the longer the interval the longer the processing time. Then, set the sub-frames, usually set at 100, doesn’t affect the processing time as much as the frame’s interval. Note: make sure that your scene can play the animation at a decent frame rate, this can hugely impact processing time for no reason, best way to speed it up is by hiding unnecessary objects and applying modifiers so that it doesn’t compute modifiers every frame change.

Note: Detailed suspension properties are explained at the end of the documentation.
Detailed Suspension Properties

Fifth, make sure the above properties are set properly, then click “Animate Suspension”. Note: “Animate Suspension” is the only operator in the addon that you can click more than once per index, this is so that you can check the suspension results and redo them whenever you want.
Binding Mesh to Rig
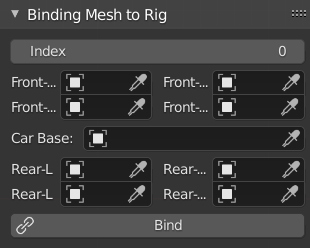
Before choosing your parts, binding requires a simple procedure.

First, make sure your rear axle is sitting above the centre of the world, and the car front facing the positive x-axis.
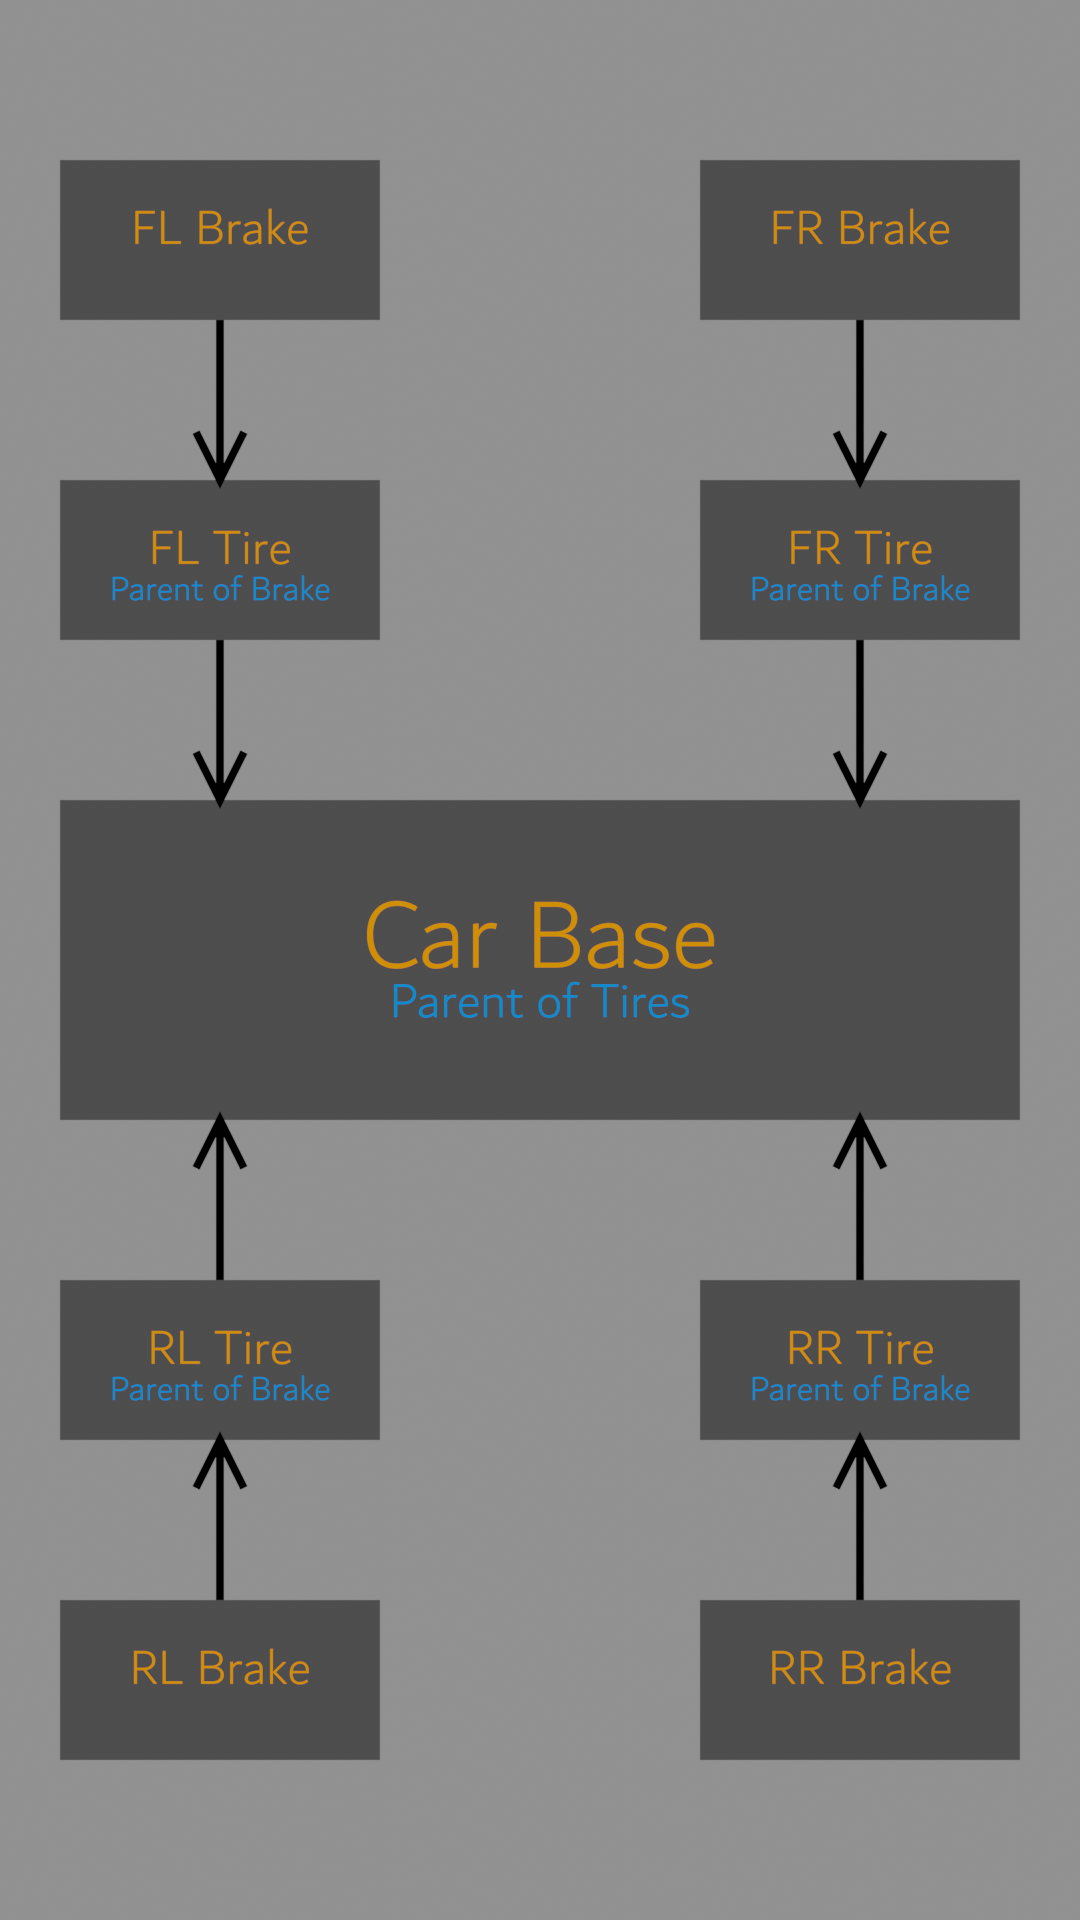
Second, follow the following diagram on how you are required to parent the tires and brakes to the car base (Arrows point towards parent).

Note: for complex models that have more than one object such as separated wheel and tire, etc. parent all these objects to the tire and select the tire in the add-on UI. As shown above.

Third, choose the tires, the car base, and the brake object.


Fourth, make sure the above properties are set properly, then click “Bind”.
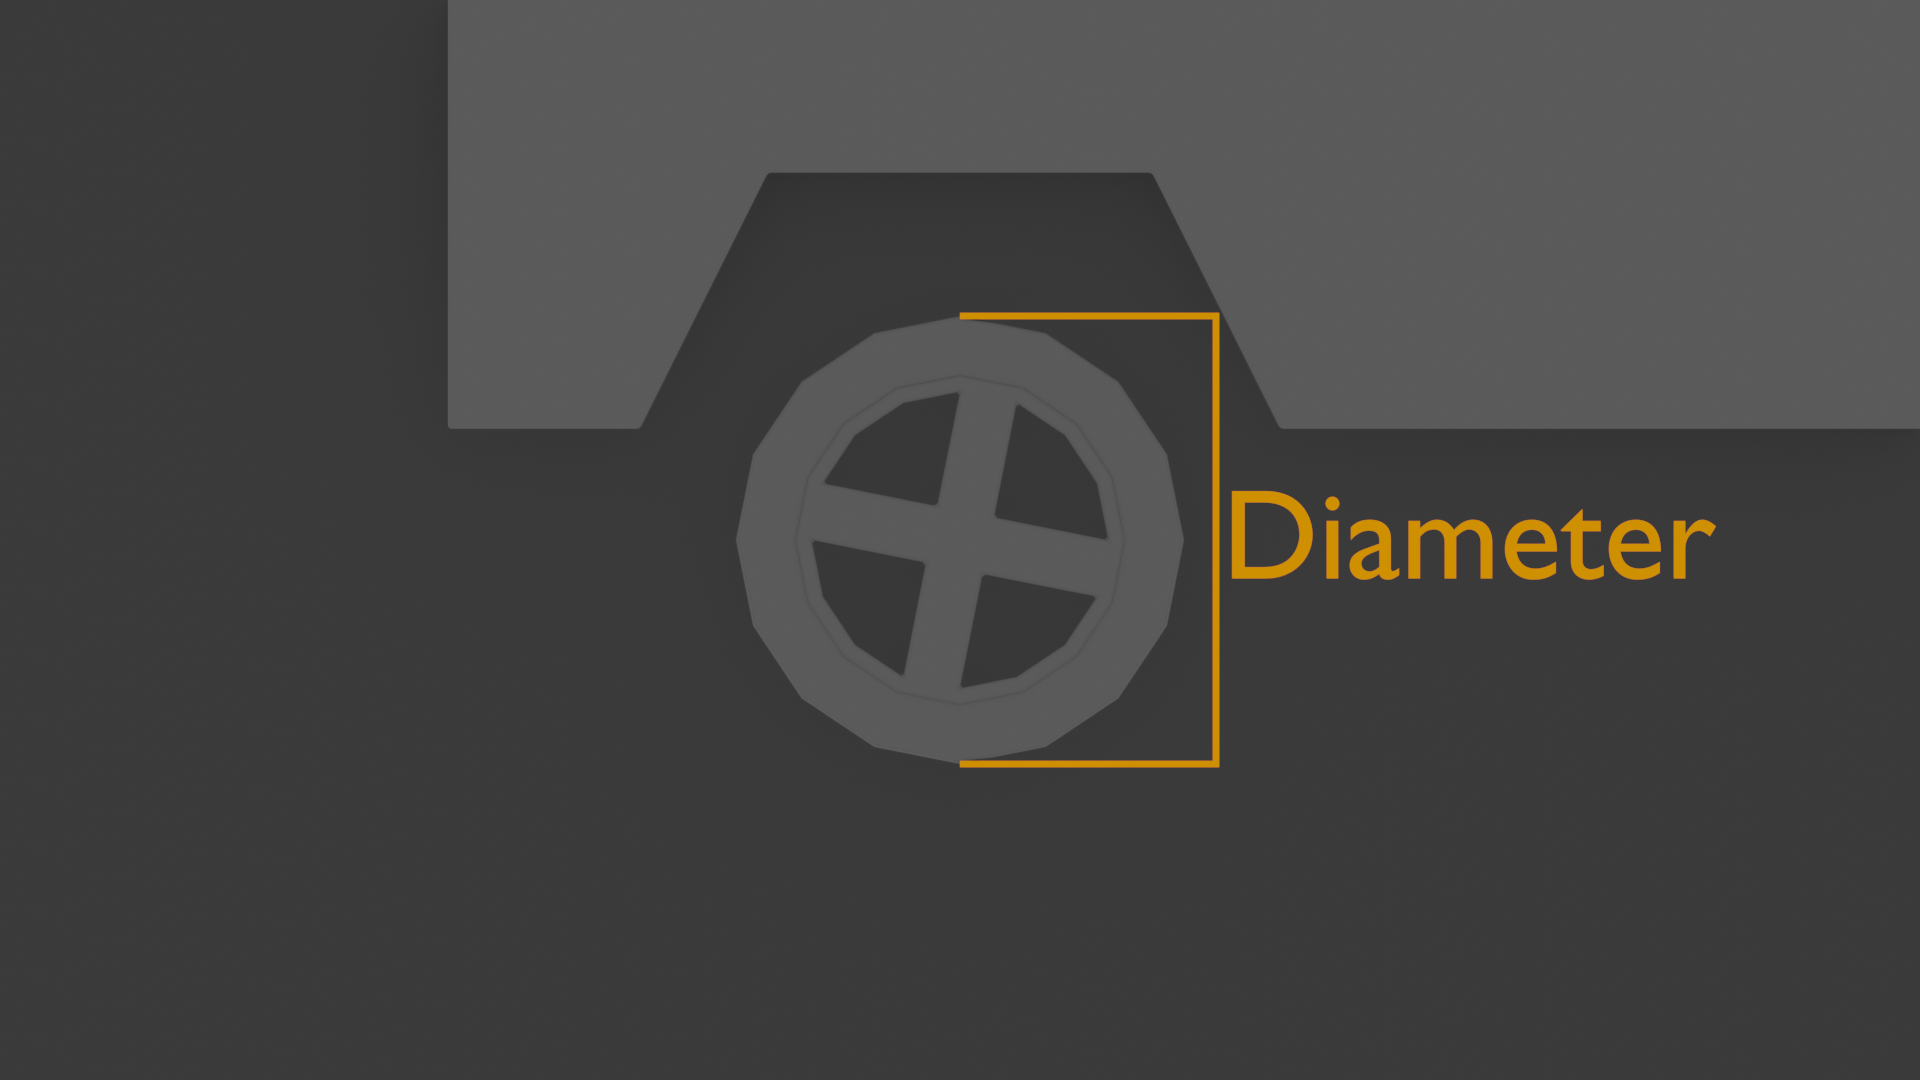
Tire Rotation
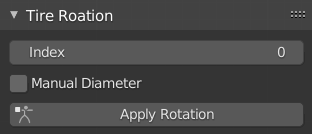
Tire Rotation Panel

Make sure the index is set properly, then click “Apply Rotation”.
Note: If you did not use mesh as your tires in the “Binding Mesh to Rig” tab, you must enter tires diameter manually.

The most important property, “Index”
The index is a numerical identifier used so that VRS can be used for multiple vehicles in the same scene. just check the index before you press any processing button, and the process will occur for the rig with that index.

Detailed Suspension Properties

Suspension Panel

Spring Stiffness: Spring rate, the higher the faster the spring oscillate lower values represents softer and slower spring, higher values represent stiffer and faster spring.

Suspension Damping: the higher the less oscillation the vehicle does before resting, should be set regarding spring stiffness (the higher the stiffness the higher the damping should be), higher values represent vehicles with less swinging (luxury vehicles), lower values represent vehicles with more swinging (essential for cartoonish look).
Tip: for realistic visuals, set damping value so that the vehicle does not oscillate more than twice before resting.

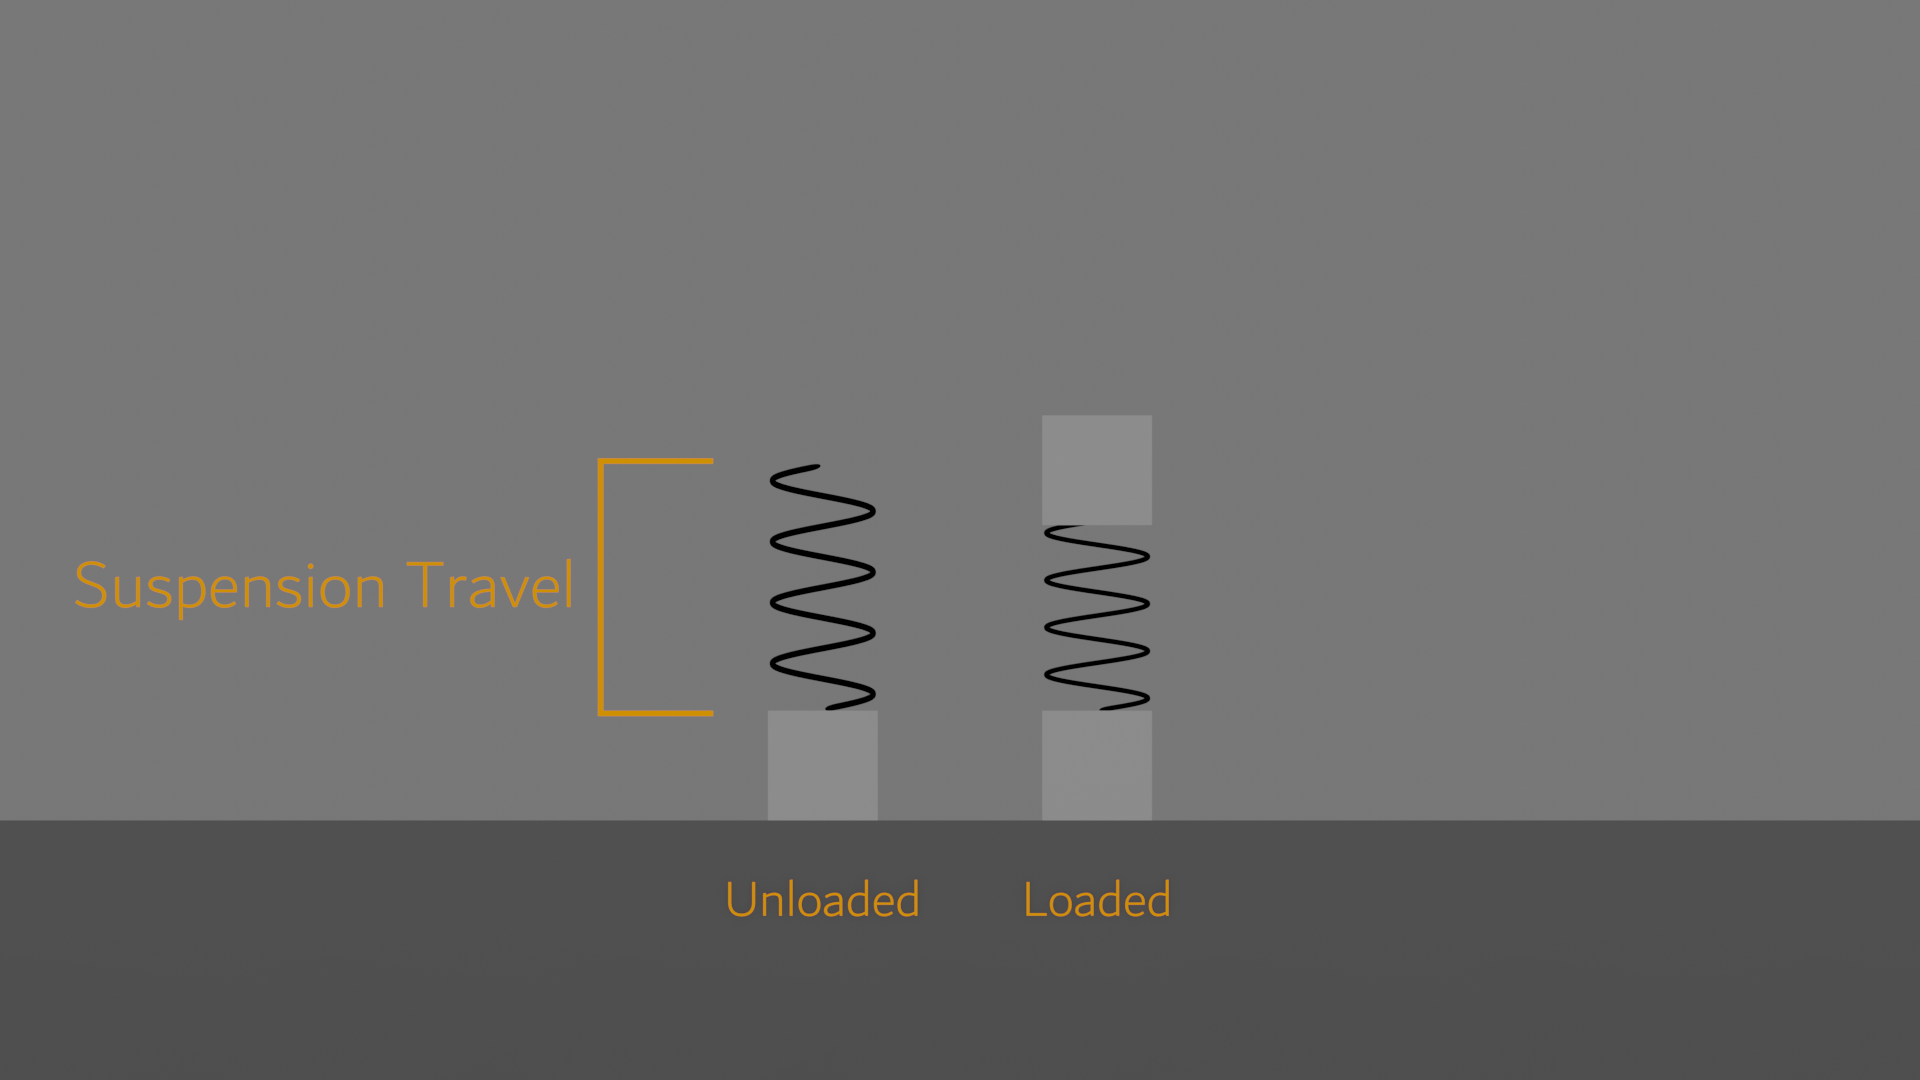
Suspension Travel: the length of the spring, the higher the longer the vertical distance the tires can encounter.

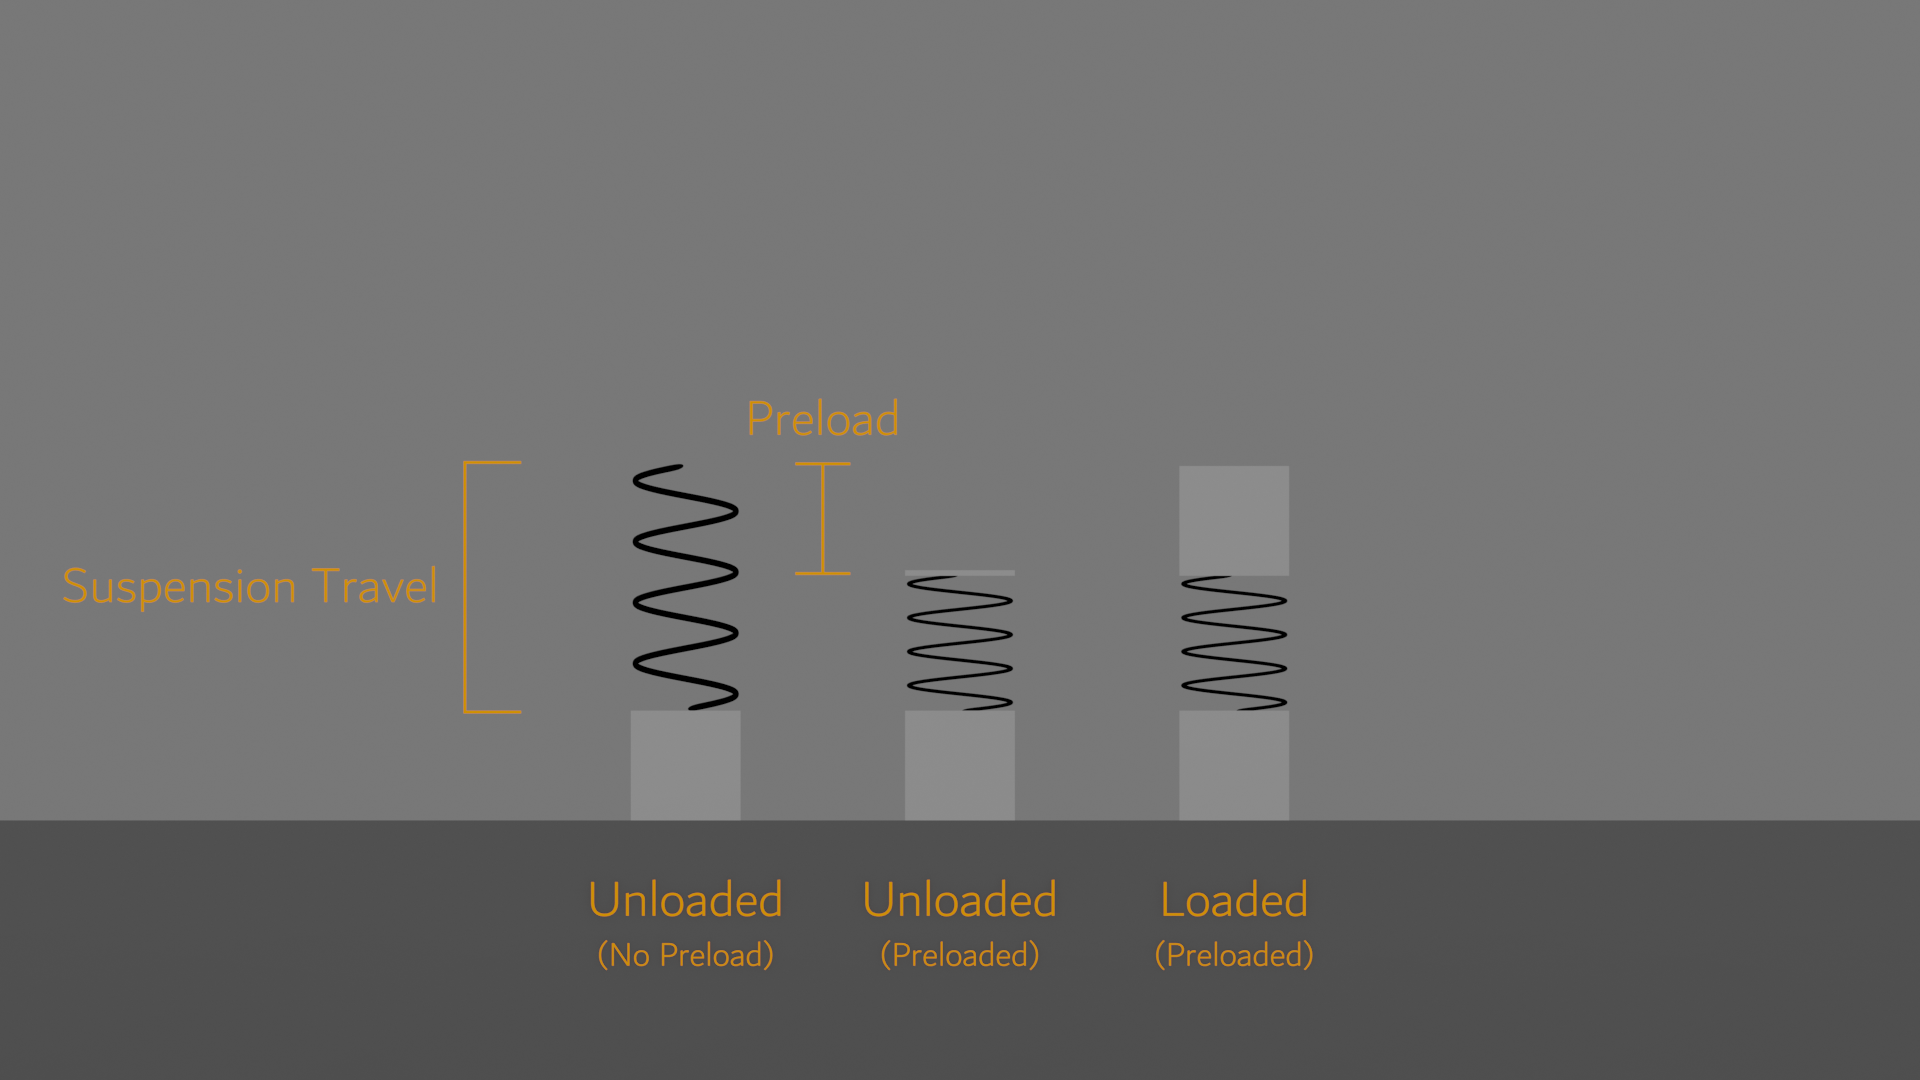
Spring Preload: the distance that the spring is compressed at full extension of the suspension. For a suspension Travel of 0.5m and Spring Preload of 0.1m, a 0.6m long spring is used and allowed to only expand 0.5m.
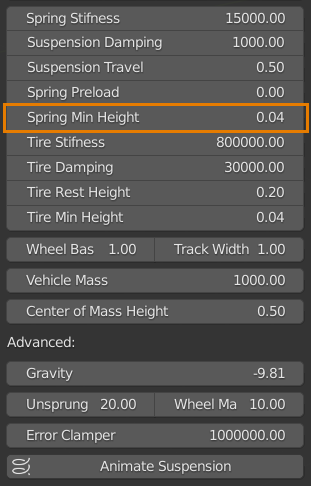
Spring Min Height: the minimum length the spring can be compressed at.

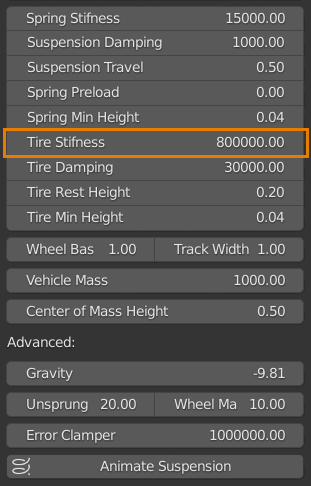
Tire Stiffness: Tires in VRS is simulated as if it is a spring, therefore: is similar to how suspension spring stiffness works, but for the tire. Also, stiffer and higher values are used here, since smaller travel is allowed.
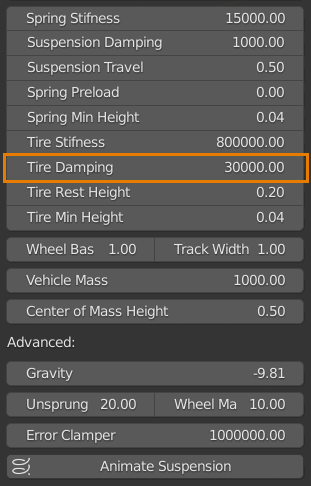
Tire Damping: As above.
Tip: Use high values for Tire Damping since it naturally stabilizes the motion.

Tire Rest Height: tire spring length, similar to Suspension travel, but for the tire.
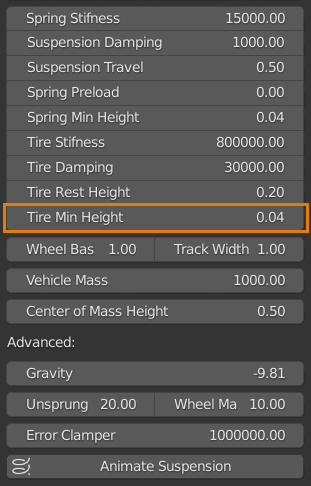
Tire Min Height: the minimum length the tire spring can be compressed at. similar to Suspension Min Height, but for the tire.
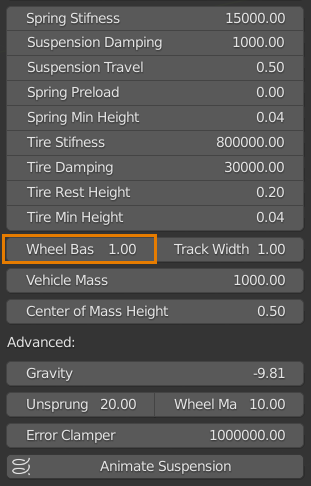
Wheel Base Multiplier: this property allows to control the body lean to front and rear. The more it is the more body lean will occur.

Track Width Multiplier: this property allows to control the body lean from side to side. The more it is the more body lean will occur.
Note, if the simulation shows inappropriate results such as the car disappearing, then this means the car will experience rollover. decrease these above multipliers to fix the issue.

Vehicle mass: the mass, by Kg, the higher the softer the springs and dampers will act like.

Center of mass Height: how high the centre of mass is from the ground, don’t use values higher than half the wheelbase or track width, or the vehicle may encounter rollover.
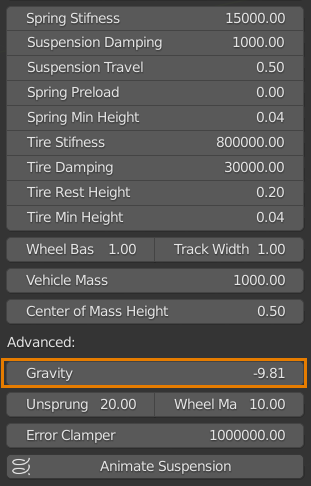
Gravity: tweaking the gravity allows for fewer or more jumps. If your car is jumping too much, then use a stronger gravity value and vice versa. Note: always negative, positive values will slowly send the vehicle to the sky.
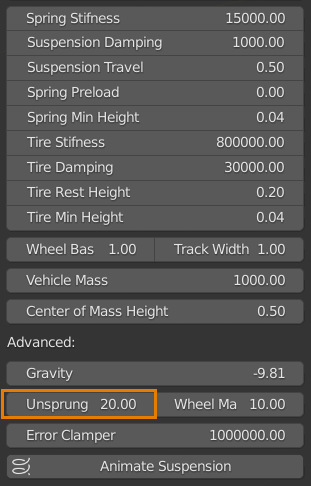
Unsprung mass: mass of suspension parts for each tire. (Parts that are connecting the tire to the Coilover)
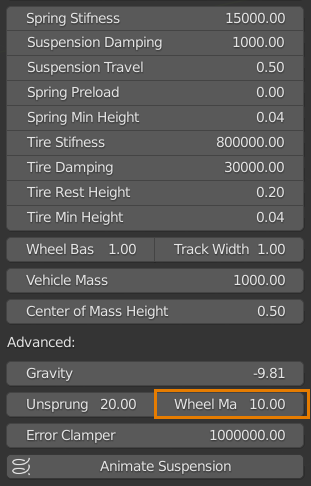
Wheel Mass: Mass of each wheel including the tire.

Error Clamper: higher values give less tolerance but can cause errors. Lower values can cause more tolerances and may trigger false error reports.